Showing posts with label My Favorite Things. Show all posts

Washi Wonder(ful)!

Monday, October 9, 2017


I use washi tape every day. Yes, without fail! Why? I use it to decorate the Scriptures I write out. (See this link with more information on the Scripture writing challenge I set up each month.) I have had a few people on Instagram ask me where I get my washi. Some of it comes from Michael's, but  a lot of it comes from Amazon.  Here's a look at some of my favorites...

{Affiliate Links Used}

I love the seasons, and seasonal washi with a botanical bent (I love to garden) is my new favorite type of washi design. I recently bought this set that has three different seasons in it, but I can see where it could be used year round...


Here's the link to it on Amazon.  It contains spring, autumn, and winter patterns, but the green and blue patterns would work for summer also. Here's a look at some pages I did with this collection...


Here are some other sets I either have or want to get in the future...

Geometric washi is fun...


Geometric washi


This circle, triangle, and square pattern comes in different colors: Pink/Orange, Blue/Green


I adore birds!  Here are several bird-themed washi tapes: birds on a wire, bird collection, birds and cages.


Here's a set of washi gardening tape that I use a lot. It mainly has succulents in the design.

I love this nighttime gold and silver washi! It is on my to-buy list for this winter.

If you love coffee (like I do) this washi is cute!!


And because I love the watercolor effect, I am looking to add this watercolor design set with eight different colors.
Finally, if you are looking for creative ideas on what to do with washi, see my Pinterest board.


The Many Benefits of an Instant Pot

Friday, November 25, 2016


{Affiliate Links Used.}

This past spring I bought one of the best tools I have ever had in my kitchen, an Instant Pot. What is it? It's an electric pressure cooker that does amazing things with food. And today, because it's Black Friday they are on sale! $68.95!

So what are some of the awesome things it does?
  • Hard-boiled eggs that actually peel easily. The Instant Pot has enticed me to do eggs again. Frankly, I hate peeling eggs, but pressure cooking eggs makes potato salad and deviled eggs a breeze.
  • Yesterday, we cooked our potatoes in the Instant Pot before mashing them. I have no idea why, but the mashed potatoes didn't have chunks and were smooth!
  • The Instant Pot cooks dried beans to perfection! I had almost given up on using dried beans until my friend demonstrated what the Instant Pot does with beans before I bought mine.
  • Recently, a friend served me oatmeal (made from steel cut oats) made in her Instant Pot. It was amazing!
  • We have loved making Mac-n-Cheese with it. A lot easier than the "normal" way.
  • It's great for cooking veggies.
  • I have loved cooking frozen meat in it for various recipes...frozen chicken beasts come out moist. You can even cook frozen hamburger and then break it up for different dishes.
These are just some of the foods I have cooked in my Instant Pot...I can say that I have tried have turned out great (except we don't like spaghetti-the noodles and sauce- in it...it clumps). I love the speed of the device and the easy clean-up...like yesterday, when we cooked potatoes...there were no boiling over pots!!!

If you decide to get one, remember that using an Instant Pot is pressure cooking so there is a slight learning curve. However, there are a ton of recipes online (See my Pinterest board here), and this is an awesome cookbook to get you started!


I have done a lot of the recipes in Great Food Fast, and they have turned out great!

So if you interested, this is the time to buy an Instant Pot (The sale ends today as it is only for Black Friday)! You can find it here!

Bullet Journal Tips for a New Year

Tuesday, November 22, 2016


{Affiliate Links Used.}

This year has been an experiment. I journeyed into the world of bullet journaling back in February and haven't looked back. Actually, I went full throttle! Once I got the hang of a regular bullet journal I set up a homeschool bullet journal to keep my son and I on track with his work (You can read about it here.) Now that I am at almost a full year of keeping my life in order this way I wonder how I ever kept organized beforehand! Before we jump into my ideas, let me explain what a bullet journal is and why it works...

A bullet journal is a hand-written day timer. You can set it up specifically for your needs and how you run your life. If you want to read about the basic set-up then go to this post. A bullet journal is WAY better than a calendar or a day timer. When you are hand writing everything out (even the set up of your schedule) you are more invested in your plans. Also, because a bullet journal is so flexible you can customize pages for the information you need and want. I love that all I need is in one place instead of scattered all over my house. No more looking for the file on my dog so I can see when he needs shots next (because I have a page for that now). No frantic searches for meal ideas (because, yeah, I have a page for that in my journal!). No wondering what book I should pick up next (Yep, there's a page for that). Read on to see how I have set things up for 2017!

So here is a quick look at my set up for 2017 and a few tips for you if you are just starting out...

First of all you need a few supplies...at bare minimum a pen and a journal...then there are the extras if you want to decorate your journal. I use colored pencils and a glitter pen, but others use washi tape, stickers, stencils, or no decoration at all.  Here is what I use:

Moleskine Notebook, Squared- I used a dotted one and decided I didn't like it as much as this squared one. The squares make it easier to create boxes and grids.

Staedtler Pigment Liners- I LOVE these pens for my bullet journal as these don't smudge and create crisp, clean lines.

Prismacolor Pencils- I use these to add a bit of color to my journal. I love that I can blend these and also create an ombre effect.

Wink of Stella Brush (in clear)- This is a glitter brush that I use over the areas where I have put down color. It adds a bit of sparkle to my pages. 

Tips and Ideas

One of the best things I did this past year in my bullet journal was to set up a page where I could record ideas of what I would want to add or take away from in my next journal. Setting up my journal for 2017 was a breeze, because I had a list of what I wanted to do. I decided that for 2017 I would continue to keep a running list of ideas so that I can modify things in 2018.


One thing that I have set up differently is my future log. This past year I just had a running log and events were all jumbled together. I really had to go searching to make sure I didn't miss anything for a particular month. So this year I have already separated the months into columns and have started listing tasks and events in their proper months.


I also set up my birthday/important dates list differently for the coming year... Below you will see my bullet journal on its side. I now have space to put important dates on either side of the month they happen in. This gives me extra space to add in dates that may be important in the future.


Here is my year-at-a-glance page which is extremely useful when you are setting up your monthly and weekly calendars. Yes, it is a lot of writing, but I refer to this page constantly through the year.


Here is a collage of some of my other pages...

  • A book list of what I am reading and have read
  • A page for important health information on the family (allergies, when procedures/shots are due, blood types, etc.)
  • A page of information for our dog, Titan (medical info, foods that work in his diet, etc.)
  • Several pages of meal ideas based on the season
  • A page where I can record what I loan out to others and when the items come back to me.


So what are you waiting for? We have little over a month left in this year...now is the time to set up your bullet journal!


Great Stories for Kids at Advent

Saturday, October 22, 2016

{Affiliate links used.}

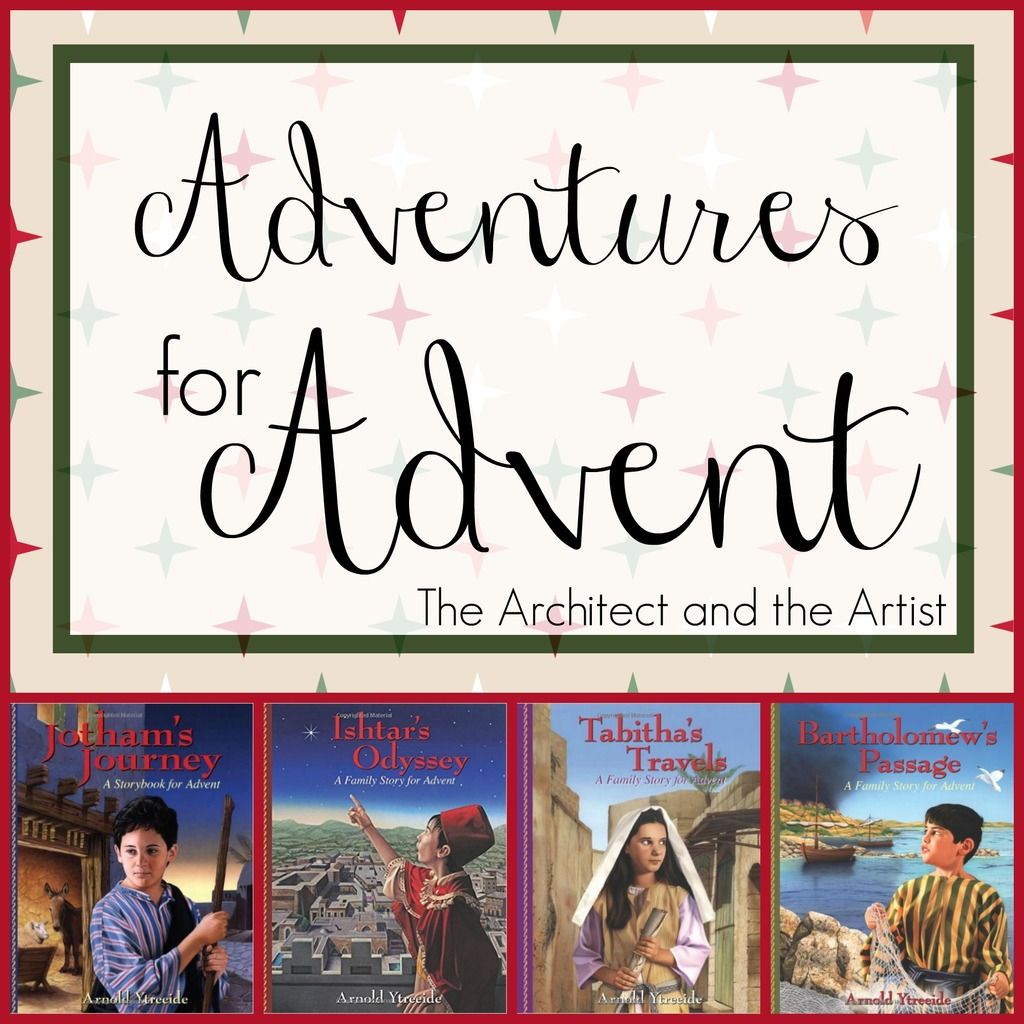
Some of my best Christmas memories didn't happen during my childhood, but rather the growing up years for my sons. When the oldest was in elementary school someone recommended Jotham's Journey to us for Advent. Jotham goes through a series of adventures that eventually lead him to the birth of Christ! Each night of Advent you read the continuing story that almost always ends in a cliff hanger (making your kids beg for more). After each part of the story there is a short devotional related to what is currently happening. The book also gives you a calendar of when Advent starts and also how to incorporate the candles that go along with Advent in your reading of the story each night.

The author, Arnold Ytreeide, has come out with three other books like Jotham's Journey


Each one of these stories surrounds the birth of Christ, and here is the absolutely awesome thing about these adventures...they are intertwined! Jotham, Bartholomew, Tabitha, and Ishtar cross paths in the story. So if your family reads one the first year and a different story the next year you get to see the story from a whole new vantage point. Last year, my husband and I (because our boys are now too old) read Ishtar's Odyssey together even though the boys didn't participate. We loved this angle of the story, because Ishtar is Persian and comes with the Wise Men to see the baby King. It added a whole new perspective!

So if you are looking for a new tradition for Advent these books would be a great addition to your season! The stories are captivating and the messages in the devotionals are not to be missed! Advent starts November 27th...so get ready for an adventure!

Using a Bullet Journal in Your Homeschooling

Monday, June 27, 2016


{Affiliate links used.}


I have been homeschooling for close to fifteen years. It has been quite the journey...one that changes with each semester and child. One of the most important aspects in getting homeschooling done is to be organized and to make sure I plan out our weeks. When there is no plan, not much will get done. Over the years I have used all kinds of homeschool planners. They have been good, but I have noticed that they mostly go unused. That isn't to say that I don't plan out each week, but rather that planners tend to have more pages than I would use. This year I wanted to customize my planner and have only pages I would really utilize. So instead of using a planner I have decided to create a bullet journal to keep us on task.

What is a bullet journal? It is a hand-written way of keeping everything organized. Here is probably the best post on the internet on how to set up a bullet journal. Keep in mind that in this post the author is showing you how to set up a bullet journal to replace your calendar or daytimer. Here I am going to show you how I set up a bullet journal just for our homeschool planning...

To create a bullet journal, you need a few items...a journal, some pens, and a ruler. You can get fancier with decorating it, but remember, that beautiful is not necessarily the goal...functionality is. I do add a little color to my homeschool bullet journal with Prismacolor pencils, but that is about it. As far as the journal goes, this one is my favorite, the Moleskine Squared Notebook (Extra Large), because it has tons of space and the paper in it is like graph paper which makes it easy to set up pages.

Here's a quick look at my set-up:


I start with an index page (actually I give my index about three pages). These pages are vital to any bullet journal as this is where you record where things are in your journal. As I write on another page, I make sure I number the page down at the bottom and then record in the index what is on that page.


The next page in my journal is a "Year-at-a-Glance" page. I start it in July and finish it in June since that works better for the school year. This page is great as you plan throughout the year. You don't have to go looking for another calendar as you setting up your months and weeks.

I then created a page that will list the classes or subjects my son will be doing. It will include space to list the curriculum I will be using for each class.


 After that page, I have a page for grades for the fall semester and another page for the spring. Because my son is high school I have to be more diligent about recording how he is doing. Even so, the only thing I really do is create a row for the class and then record the individual grades in that row. When I need an official grade I will average the numbers for that class.

When we start a new month I will create an overview page for the month. On this page I will write overall goals for the month, days when won't do school, and any special events. I will also include tasks I will need to do for the month in regards to our schooling...like, for example, in July, I will write a list of curricula that I still need to order.


The weekly pages will be the heart of my homeschool bullet journal. Across the side, I list the days of the week; at the top of each column I write the classes (one class per column) and then I can fill out each square on what we need to accomplish in each subject. The weekly spread can be formatted differently if you are homeschooling more than one child or you can create separate weekly spreads for each child. Do what works for you!

So those are some examples of what my bullet journal looks like, but the beauty of a bullet journal is that you can create pages for almost anything! Maybe you need a list of books you are going to read. Or you need a field trip schedule. Maybe you need to have planning pages for a unit study. You can create any type of page you could possibly need!

My Favorite Bible Highlighters

Monday, June 20, 2016

{Affiliate links used.}

Over the past few months, I have had a few people over social media ask me about the pencil highlighters I use in my journaling Bible. So let me take a few moments to tell you about these amazing tools!

How can a highlighter be amazing? Frankly, because so many of them are not! I have used my share of ink-based highlighters in my Bible over the years, and I have never really fell in love with them. Some of them bleed through. Or they leak. Or the color is way too jarring. And then there is the moment when you least expect it...they dry out.

About two years ago, I came across these pencil highlighters, bought a set, and fell in love with them! They have a natural wood finish and are a little bit bigger around than a normal pencil (which I love). I love the way the pencil color glides onto the page! I originally had bought a set of five colors (pink, green, yellow, orange, and blue). I have to admit that the blue one wasn't my favorite as it was a little on the dark side. Since then I have noticed that the company has also come out with a set that includes purple. I am not sure how the purple looks on the page...it may be similar to the blue, however, at some point I would love to get a purple one as it is one of my favorite colors.


Since these pencils are a tad bit bigger around, it is wise to get a set with the little sharpener (which by the way does an amazing job). However, they aren't so big and chunky that they put too much color or too thick on a line on the page. Actually, I have found them to be the perfect size for highlighting text in my journaling Bible.

So here are the options of different sets along with my a link to my favorite journaling Bible...notice that you can also get the pencil sets all in one color. I have also included the link for buying the pencil sharpeners separately.


"Useful" Coloring

Wednesday, June 1, 2016

{Affiliate links used.}

I love coloring, but sometimes I would like to color and have it put to good use! Here are several options available for coloring things you can then actually use...

I so want these as I use a lot of file folders! Here are a few options...


Aren't these cute? They come in a pack of four designs (3 each) for a total of 12 files.

Or how about these?


Cityscapes File Folders

Another option is to color cards. I used to make cards with stamps, but I have kind of moved away from making them. Here are some alternatives for coloring cards and then mailing them out...

Creative Expressions- These are not actually cards per se, but rather one-sided cards you can color to put in with your correspondence or a gift tags. Note the size of these as they are about the size of a business card. Many of them contain Bible verses.


The Coloring Book of Cards and Envelopes: Nature- These are actually cards that come with envelopes. With the envelopes you color them and then fold them.


Animal Kingdom Postcards

Another option is planners and calendars...


Here is an example of a planner...Color Your Year.


A daily coloring page throughout the year.

There are also coloring journals out there now! Color and write!


Beautiful Botanicals Journal

And finally, here is a look at the supplies that I love to use for coloring...

Tools for coloring:


Here is what I use...

Prismacolor Premier Soft Core Colored Pencils-These soft core pencils are great for laying down color in large areas.

Prismacolor Verithin Colored Pencils-These are what I use for detail work.

Sanford Prismacolor Colored Pencil Accessory Set, 7-Piece-Love this! The blender pencil is such a fun item to use to blend color. It also includes erasers, a sharpener, and a pencil lengthener.

LolliZ Gel Pens -When I don't want to go the pencil route I use these. Bolder colors.

Sakura Gelly Roll Metallic Gel Ink Pen Set-These are fun as the metallic shine really comes through!