Showing posts with label Recipes. Show all posts

The Many Benefits of an Instant Pot

Friday, November 25, 2016


{Affiliate Links Used.}

This past spring I bought one of the best tools I have ever had in my kitchen, an Instant Pot. What is it? It's an electric pressure cooker that does amazing things with food. And today, because it's Black Friday they are on sale! $68.95!

So what are some of the awesome things it does?
  • Hard-boiled eggs that actually peel easily. The Instant Pot has enticed me to do eggs again. Frankly, I hate peeling eggs, but pressure cooking eggs makes potato salad and deviled eggs a breeze.
  • Yesterday, we cooked our potatoes in the Instant Pot before mashing them. I have no idea why, but the mashed potatoes didn't have chunks and were smooth!
  • The Instant Pot cooks dried beans to perfection! I had almost given up on using dried beans until my friend demonstrated what the Instant Pot does with beans before I bought mine.
  • Recently, a friend served me oatmeal (made from steel cut oats) made in her Instant Pot. It was amazing!
  • We have loved making Mac-n-Cheese with it. A lot easier than the "normal" way.
  • It's great for cooking veggies.
  • I have loved cooking frozen meat in it for various recipes...frozen chicken beasts come out moist. You can even cook frozen hamburger and then break it up for different dishes.
These are just some of the foods I have cooked in my Instant Pot...I can say that I have tried have turned out great (except we don't like spaghetti-the noodles and sauce- in it...it clumps). I love the speed of the device and the easy clean-up...like yesterday, when we cooked potatoes...there were no boiling over pots!!!

If you decide to get one, remember that using an Instant Pot is pressure cooking so there is a slight learning curve. However, there are a ton of recipes online (See my Pinterest board here), and this is an awesome cookbook to get you started!


I have done a lot of the recipes in Great Food Fast, and they have turned out great!

So if you interested, this is the time to buy an Instant Pot (The sale ends today as it is only for Black Friday)! You can find it here!

Bullet Journal Tips for a New Year

Tuesday, November 22, 2016


{Affiliate Links Used.}

This year has been an experiment. I journeyed into the world of bullet journaling back in February and haven't looked back. Actually, I went full throttle! Once I got the hang of a regular bullet journal I set up a homeschool bullet journal to keep my son and I on track with his work (You can read about it here.) Now that I am at almost a full year of keeping my life in order this way I wonder how I ever kept organized beforehand! Before we jump into my ideas, let me explain what a bullet journal is and why it works...

A bullet journal is a hand-written day timer. You can set it up specifically for your needs and how you run your life. If you want to read about the basic set-up then go to this post. A bullet journal is WAY better than a calendar or a day timer. When you are hand writing everything out (even the set up of your schedule) you are more invested in your plans. Also, because a bullet journal is so flexible you can customize pages for the information you need and want. I love that all I need is in one place instead of scattered all over my house. No more looking for the file on my dog so I can see when he needs shots next (because I have a page for that now). No frantic searches for meal ideas (because, yeah, I have a page for that in my journal!). No wondering what book I should pick up next (Yep, there's a page for that). Read on to see how I have set things up for 2017!

So here is a quick look at my set up for 2017 and a few tips for you if you are just starting out...

First of all you need a few supplies...at bare minimum a pen and a journal...then there are the extras if you want to decorate your journal. I use colored pencils and a glitter pen, but others use washi tape, stickers, stencils, or no decoration at all.  Here is what I use:

Moleskine Notebook, Squared- I used a dotted one and decided I didn't like it as much as this squared one. The squares make it easier to create boxes and grids.

Staedtler Pigment Liners- I LOVE these pens for my bullet journal as these don't smudge and create crisp, clean lines.

Prismacolor Pencils- I use these to add a bit of color to my journal. I love that I can blend these and also create an ombre effect.

Wink of Stella Brush (in clear)- This is a glitter brush that I use over the areas where I have put down color. It adds a bit of sparkle to my pages. 

Tips and Ideas

One of the best things I did this past year in my bullet journal was to set up a page where I could record ideas of what I would want to add or take away from in my next journal. Setting up my journal for 2017 was a breeze, because I had a list of what I wanted to do. I decided that for 2017 I would continue to keep a running list of ideas so that I can modify things in 2018.


One thing that I have set up differently is my future log. This past year I just had a running log and events were all jumbled together. I really had to go searching to make sure I didn't miss anything for a particular month. So this year I have already separated the months into columns and have started listing tasks and events in their proper months.


I also set up my birthday/important dates list differently for the coming year... Below you will see my bullet journal on its side. I now have space to put important dates on either side of the month they happen in. This gives me extra space to add in dates that may be important in the future.


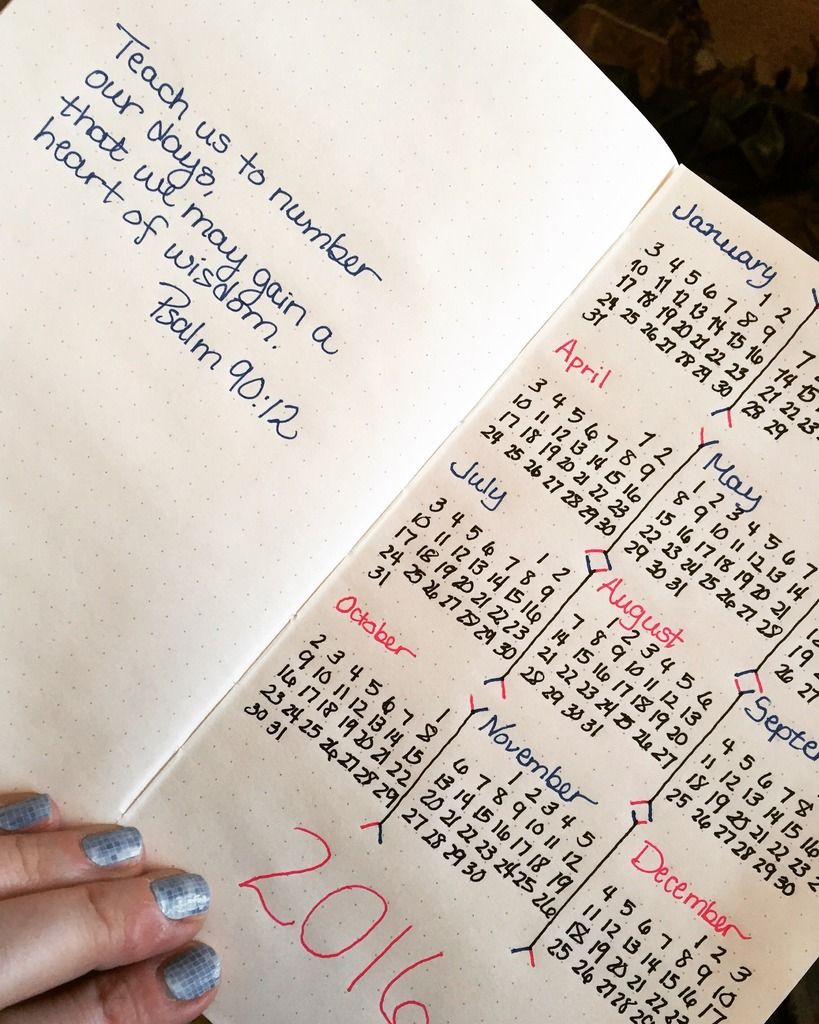
Here is my year-at-a-glance page which is extremely useful when you are setting up your monthly and weekly calendars. Yes, it is a lot of writing, but I refer to this page constantly through the year.


Here is a collage of some of my other pages...

  • A book list of what I am reading and have read
  • A page for important health information on the family (allergies, when procedures/shots are due, blood types, etc.)
  • A page of information for our dog, Titan (medical info, foods that work in his diet, etc.)
  • Several pages of meal ideas based on the season
  • A page where I can record what I loan out to others and when the items come back to me.


So what are you waiting for? We have little over a month left in this year...now is the time to set up your bullet journal!


My {Un}Organized Life {Ideas and Tips}

Monday, March 7, 2016

{Affiliate links used.}

My husband always says I am an organized person, but I have an ugly, little secret... I am really deep down a lazy, laid-back girl who if given the opportunity will let things go by the wayside. Running an in-home business has forced me to stay on top of things; however, I can ALWAYS use help with organization. So here is a look at what I am doing currently to keep life sane...


Freezer Cooking

I have done freezer cooking for years. It started with a friend and I getting together once a month to make meals and then split them. While the friendship is still going strong, our monthly meal-making adventures haven't. We now cook separately. However, I have not lost the habit of having meals in the freezer. It is my lifeline! I homeschool my youngest in the morning and then give Spanish lessons in the afternoon until six almost every day. Without meals that I can quickly pull together we would not eat! I still feel anxiety when I open the freezer and the meals look a little sparse. Once I got into the habit of freezer cooking I haven't turned back and probably never will.

Here are some helpful resources to get started:

Here are all my posts on freezer cooking. One October, I even did a series called 31 Days of Freezer Cooking. So check these out to get ideas and tips.

Life as Mom has been my favorite site for getting tips and ideas for meals in the freezer. She even has a cookbook, Not Your Mother's Make-Ahead and Freeze Cookbook.


Decluttering

This year I embarked on a decluttering adventure with a friend. Honestly, it was her idea. I wouldn't have had the gumption to do it on my own, but I am so glad she nudged me to do it. I am using the decluttering calendars from Home Storage Solutions 101. This has been absolutely awesome! I just recently decluttered my kitchen and now I have so much more space! I feel so accomplished!


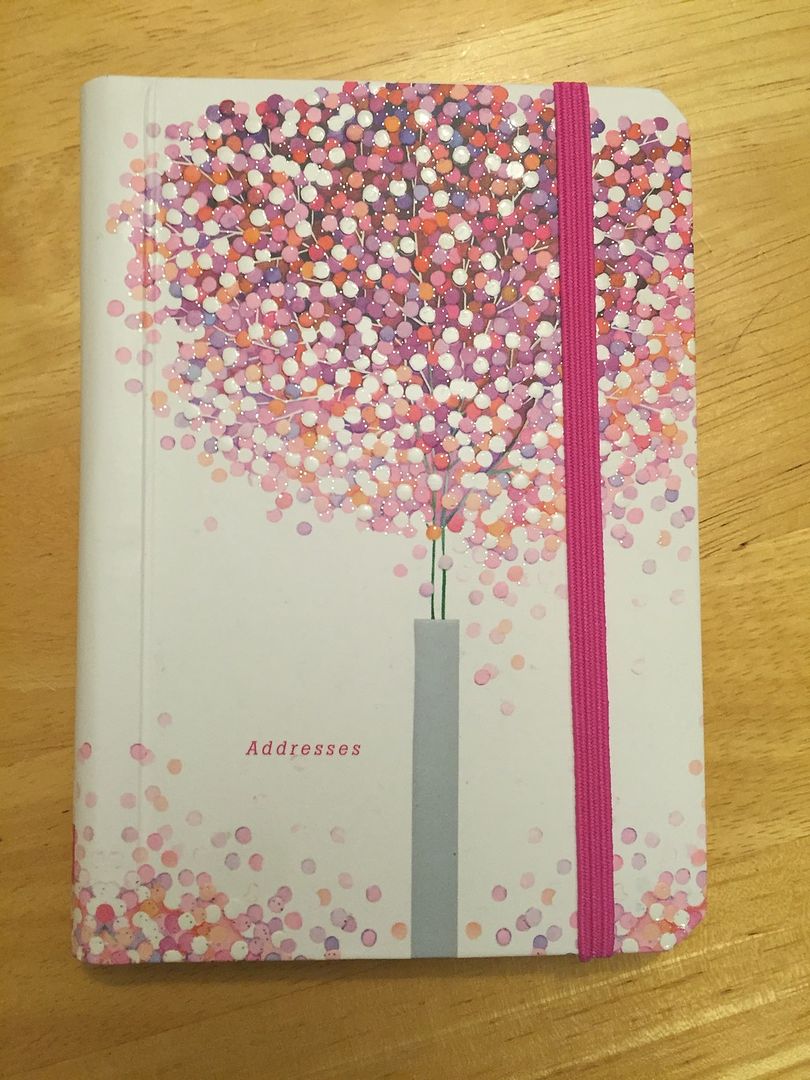
The monthly decluttering calendars are not only just about getting rid of stuff; they are also a way to organize your life. For example, a few weeks ago one of the tasks was to update your address book. I bought this Lollipop Tree Address Book address book and updated all my information. My address book hadn't been updated in about TWENTY years!! Ugh! I had people in the old book whose names had changed, who I never contact anymore, or have passed away. I so needed to do this!

The beauty of these calendars is that you start whenever. Don't worry if you are in the middle of the year.

Bullet Journaling

About a month ago, I came across the blog, Hope. Dream. Journal. Allycia mentions bullet journals in several of her posts. I was intrigued! I had never heard of them and started reading more. Then I created a Pinterest board to collect ideas.


Follow Debbie in AK's board Bullet Journals on Pinterest.

So what is a Bullet Journal? It is a hand-written way to keep your days organized, to collect lists, and to record memories. I have used a regular planner for years but decided to take the leap and try this type of journal to see how it would work for me.

I came across this post from The Lazy Genius Collective...it is the mother of all posts on how to set up a bullet journal! I actually printed this post off (it is long...) and read it several times, because I have a serious problem reading instructions (Ask several of my friends...I am hopeless!). After I set it up the genius of it made sense to me! There are ways to keep track of tasks, events, and memories all in one book. All you need is a journal and some pens. Some people decorate theirs with washi tape and the like, but it can be as simple as paper and pen.  Here are some ideas on journals and pens:


Moleskine Classic Colored Notebook {This is the one I am using.}

Leuchtturm 1917 Notebook  {Many people use this one. I may try it next time.}

Pentel Gel Pens {These are my favorites, but any pen will do.}

{The Year-at-a-Glance Page in my Bullet Journal}

Tips for the Organizational Journey

Don't Go It Alone. One of the biggest helps to getting organized is to do it with a friend. That's how I started freezer cooking. My adventures in decluttering started this year because a friend texted me asking if I wanted to join her on her journey. At first I thought, "Are you kidding me?! I can't do this!" I am the woman who heats up a burrito in the microwave only to find it the NEXT day still sitting there where I left it. {True story.} If I can't keep the inside of my microwave decluttered how was I going to clean out my whole house? I am so glad she asked me along for the ride. It is easier when you have someone else joining you and encouraging you on! Find a friend to walk with you on your organizational journey.

Knowledge is Power. There is no need to reinvent the wheel. Whatever endeavor you want to do to get more organized read up on it. There are blog posts on how to freezer cook, clean, bullet journal, etc. People have actually spent time writing down how to go about these tasks. Make it easier on yourself by reading tips and tricks to get the job done instead of through trial and error.

Give Yourself Grace. There are just those days. Like the weekend, I was down with a virus and hacking out a lung. Nothing got done that day except for me to renew my friendship with the couch! It's ok to have days where you can't get it all done. Do what you can when you can. I have no idea if I am going to be able to follow through ALL year on decluttering, but you know what? At least at this point I have a decluttered kitchen, garage, and a brand new address book. Allow yourself to not be perfect as you push toward your goals.

Happy Organizing!!


Great Biscotti Recipes

Friday, November 21, 2014


Last year I made biscotti for our Christmas goodies instead of doing a bunch of different cookies. I fell in love with the idea that I plan on doing it again this year. The beauty of biscotti is that you can do it ahead of time, freeze it, and then {if desired} dip it in chocolate before enjoying.  Here are a couple of recipes and tips that I have used...

Chocolate Biscotti
I have found the dough to be hard to deal with when it comes to chocolate and biscotti.  I liked this recipe from Mama's Gotta Bake the best.  I actually made chocolate peppermint biscotti with her recipe by omitting the nuts and adding a 1/2 teaspoon peppermint extract.  I plan to dip these in white chocolate and sprinkle with crushed candy canes.

Almond Biscotti
I love anything with almond flavoring especially during the holidays. Here are two great recipes I have used in the past.
Almond Orange Biscotti
Almond Vanilla Biscotti

Other Flavors
Here are some other flavors that I am interested in trying this year. I just need to narrow it down to a more manageable list!
Nutella
Mocha
Key Lime
Coconut
Lemon
Snickerdoodle


Tips for Making Biscotti

-Select recipes with at least a little bit of fat (normally butter) as they are easier to slice

-Refrigerate or put the dough in the freezer for 20 to 30 minutes if it is too gooey to shape.

-I tried two different chocolate biscotti and found that both the doughs were hard to deal with when shaping.  The one recipe I have posted above was the better one.  Once you get the logs shaped the biscotti turns out beautifully.

-Be patient during the cooling of the "log" before slicing. Makes slicing easier. 

-Biscotti keeps well. Freeze it early in December and then you can take it out closer to gift giving time and dip in chocolate if you desire. 

Waffles in Bulk

Wednesday, November 19, 2014


There are times that you are so sick of being behind that you force yourself to get ahead. In October, I came down with a nasty virus for a couple of weeks that turned into seven weeks. Followed by the flu. It's been rough to say the least.  My family barely had food on the table as I was trying to piecemeal life all together. I decided (on one of my good sick days) to make a ton of waffles to put in the freezer so I wouldn't  have to face another morning of no food for my hungry teen sons.

This recipe {which I doubled} made over 60 waffles in my Cuisinart 6-Slice Waffle Iron! We were set for life! Don't I wish!

These freeze well. In the morning we just pop them into the toaster to heat them up.

Waffles for the Freezer

6 cups all-purpose flour
1/4 cup sugar
3 tablespoons baking powder
1 1/2 teaspoons baking soda
1 1/2 teaspoons salt
5 cups milk
1 cup  oil
6 large eggs

Place all the ingredients in a large bowl and mix well. Let the batter rest for five minutes. Cook the waffles (NOTE: Mine took 5 minutes each, but each machine is different.)  Let cool completely and bag in gallon-size Ziploc bags. Freeze.  On the morning of serving all you need is to toast them until heated through.

NOTE: Double the recipe! While this will take longer to get through all the batter it is so worth it to have all those beautiful, golden waffles in the freezer!

Getting Thanksgiving on the Table

Thursday, November 13, 2014


{Affiliate links used. Thanks for supporting my blog.}

Thanksgiving in the freezer? Sounds a bit strange, but last year I pre-made a few of our Thanksgiving dinner items and stuck them in the freezer for that infamous Thursday.  It was a lifesaver!

I made the dressing and froze it in a 9 by 13 pan.  I even made a second pan of it for a friend because she loves it so much.  Here is the recipe:

To-Die-For Dressing
{Recipe from my dad}

7 oz.  herb seasoned dressing
7 oz. cornbread stuffing
15 slices dry bread cubes
2 large celery sticks, chopped fine
1/2 large onion, chopped
1 1/2 cups butter
3 tsp. poultry seasoning
1 1/2 tsp sage
chicken broth

Melt the butter in a large skillet. Add celery, onion, sage, and poultry seasoning.  Cook until onion and celery are soft. Put the cubed bread and the two types of stuffing (seasoned and cornbread) into the sauce and mix well.  Pour chicken broth over the bread to make the mixture sticky.  No dry or crunchy stuff!  Spray a pan with oil and put the dressing in the pan.  At this point you can freeze it or bake it for 30 minutes at 325 degrees.  You will need to thaw before baking if that is the route you take.


Mashed potatoes are another item that can be made ahead and put in a pan to be placed in the freezer.  Honestly, I never really use a recipe for mashed potatoes.  I basically peel and quarter the potatoes and cook them in boiling water until tender.  I then blend them in my Kitchen Aid with butter, chicken broth, and either milk, sour cream or cream cheese.

The dessert side of Thanksgiving can also be frozen whether it is a traditional pumpkin pie or another type of dessert.  My family loves pumpkin pie...that is the whole family except me.  While I like it I would prefer to have a different type of pie.  Here are some other options...not very traditional, but hey, why be boring?!  It is ok to mix it up a bit!


Peanut Butter Pie

1 graham cracker pie crust (or a chocolate pie crust)
1 (8oz) package cream cheese
1/2 cup peanut butter
1 cup powdered sugar
1 T. vanilla
1 (8oz) carton of Cool Whip

Make sure the cream cheese is at room temperature.  Mix all ingredients together and pour into pie crust.  If desired, chop Reese's peanut butter cups and put on top or drizzle melted chocolate chips on top.  Refrigerate for at least four hours before serving.

Key Lime Pie

1 graham cracker crust
4 t. grated lime zest
4 egg yolks
1 (14 oz) can sweetened condensed milk
1/2 cup fresh lime juice

Preheat oven to 325. Whisk the lime zest and egg yolks together in a medium bowl for 2 minutes (I used my Kitchen Aide). Whisk in the sweetened condensed milk, then the lime juice. Let set a few minutes for the filling to thicken. Pour filling into the crust. Bake until the center is set, yet wiggly when jiggled, about 15 minutes. Cool at room temperature and then refrigerate at least three hours.


Caramel Apple Pie -- A little bit more work, but worth it! Better than normal apple pie!

So be creative! What can you stick in the freezer ahead of time to save you work on the big day?

If you are looking for other ideas on how to take a meal from freezer to table and save time and money check out Not Your Mother's Make-Ahead and Freeze Cookbook. Jessica offers loads of great ideas and recipes to make meals easier.
Seven Awesome Pumpkin Recipes

Friday, November 7, 2014

{Affiliate links used. Thanks for supporting this blog.}

If you have been around my blog at all you know that I love pumpkins!  Here is a collection of some of our favorite recipes that take pumpkin...


Pumpkin Chocolate Chip Muffins

1/2 cup oil
4 eggs
3 cups flour
2 cups sugar
1/2 t. cinnamon
1/2 t. salt
2 t. baking soda
1 small can pumpkin
12oz. semi-sweet chocolate chips

Preheat oven to 350. Beat eggs and sugar. Mix in rest of ingredients. Bake for 20 min. I normally make mini muffins out of this.


Pumpkin Chocolate Chip Cookies

4 cups flour
2 cups oats
2 teaspoons baking soda
2 teaspoons cinnamon
1 teaspoon salt
1 1/2 cups butter
2 cups brown sugar
1 cup sugar
1 egg
1 teaspoon vanilla
1 - 16oz can pumpkin
2 cups chocolate chips

Preheat oven to 350 degrees. Combine flour, oats, baking soda, cinnamon and salt. Set aside. In a large bowl cream butter, gradually add sugars, beating until light and fluffy. Add egg and vanilla; mix well. Alternate additions of dry ingredients and pumpkin, mixing well after each addition. Stir in chocolate chips. Drop by 1/4 cup dough amounts onto greased cookie sheet. Bake 20 minutes. (You can make them half the size - regular cookie drop amount- but check the around 12-15 minutes as they may need to come out sooner than the large size.) Enjoy!


Black Bean 'n' Pumpkin Chili

1 med. sweet yellow pepper, chopped
1 med. onion chopped
3 garlic cloves, pressed or minced
2 T. olive oil
3 cups chicken broth
2 cans (15 oz each) black beans, drained
2 1/2 cups chopped chicken (or turkey)
1 can (15 oz) solid-pack pumpkin
1 can (14 oz) diced tomatoes
2 t. dried parsley
2 teaspoons chili powder
1 1/2 teaspoons oregano
1 1/2 t. ground cumin
salt

Saute onion, pepper and garlic in oil. Transfer to a big pot or slow cooker for simmering. Stir in the remaining ingredients. Simmer.


Nikki's Pumpkin Fudge

1 1/2 c. sugar
2/3 c. evaporated milk
1/2 c. pumpkin
2 TBS. butter
1 1/2 tsp. pumpkin pie spice
1/4 tsp. salt
2 c. mini marshmallows
1 pkg. (12oz) vanilla baking chips
1 tsp. vanilla extract

Line 8 inch square pan with foil. Grease the foil. Butter the sides of a heave sauce pan.Combine sugar, evaporated milk, pumpkin, butter, pumpkin pie spice, and salt. Stir constantly while bringing it to a boil over medium heat. Once boiling, continue boiling 12 minutes. Remove from heat. Stir in marshmallows,vanilla chips and vanilla extract. Stir until all ingredients are melted. Pour into square pan. Chill until firm. Cut in squares and store in the fridge.


Pumpkin Pie Smoothies
32 oz plain or vanilla yogurt
(Note: any type of pumpkin pie filling would work.  Make sure it isn't just pureed pumpkin!)

Blend in the blender with a bit of water.  This amount makes about 9- 8oz. containers of smoothies.


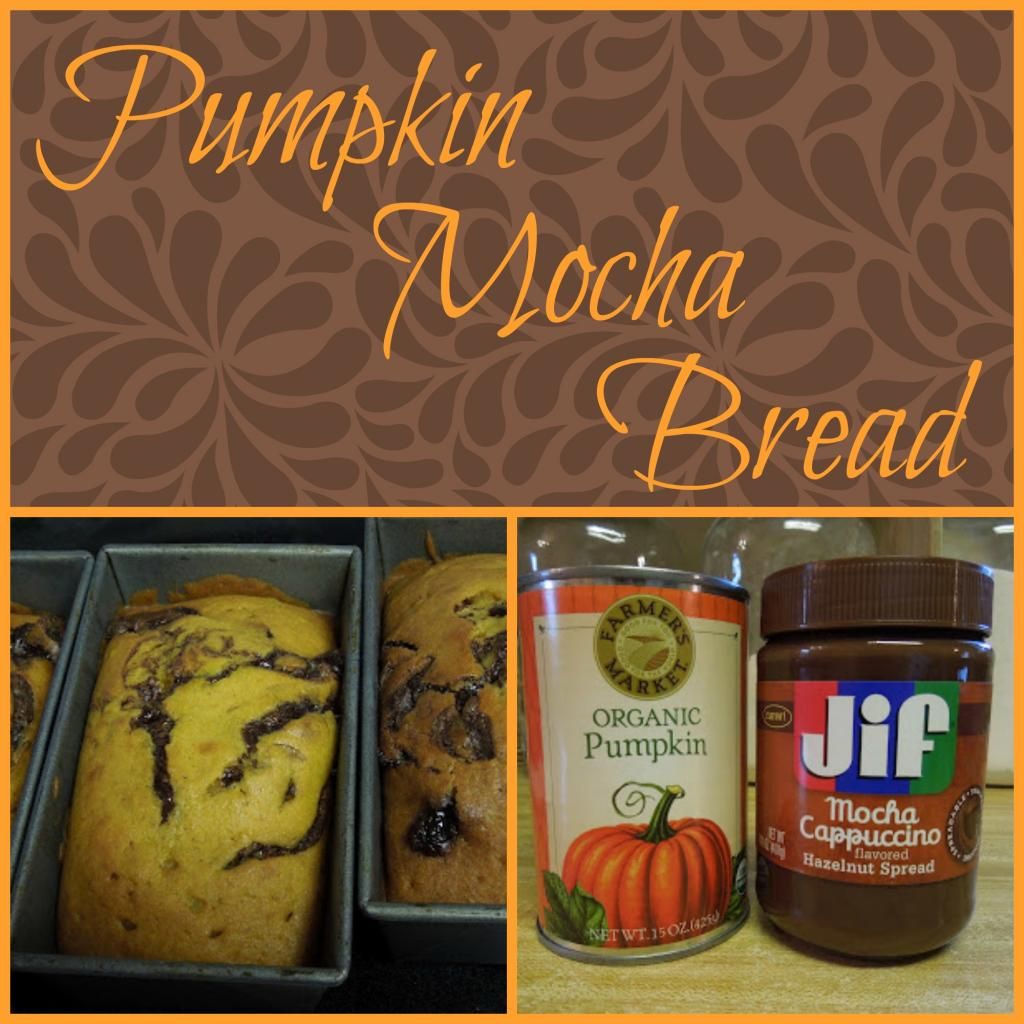
Mocha Pumpkin Bread

3 1/2 cups flour
2 t. baking soda
1 t. salt
1 T. cinnamon
3 t. nutmeg
2 cups sugar (the original recipe would have been three cups)
1 cup oil
2/3 cup water
2 cups canned pumpkin (Not pumpkin pie filling)
4 eggs
2 t. vanilla

Preheat the oven to 350. Mix together the sugar and the wet ingredients (minus the mocha spread).  In another bowl, mix the flour, baking soda, salt, cinnamon, and nutmeg. Slowly stir in the flour mixture to the wet mixture.  Mix until ingredients are combined.  Pour batter into loaf pans or muffin pans (make sure you spray the pans with oil or use muffin liners). Drop some of the mocha spread on the batter and swirl.  Bake small loaves for about 40 min., muffins for about 20 min., and larger loaves for about 60 min. Yum!

Pumpkin Scones with Cinnamon Icing

1 cup whole wheat pastry flour

1 cup all-purpose flour
1 1/2 teaspoons baking powder
1/4 teaspoon salt
1 teaspoon ground cinnamon
1/2 teaspoon ground nutmeg
1/8 teaspoon ground ginger
1/8 teaspoon ground cloves
6 tablespoons butter, sliced and chilled
1/3 cup pumpkin puree
1/3 cup heavy whipping cream
6 tablespoons brown sugar
2 teaspoons vanilla extract

Cinnamon Icing Ingredients:
1 cup powdered sugar
1 teaspoon ground cinnamon
1-2 tablespoons milk

1. In a large mixing bowl, whisk together the first 8 ingredients (dry). Cut in butter until coarse crumbs form.
2. In a smaller mixing bowl, whisk together the pumpkin, cream, sugar, and vanilla.
3. Add to dry mixture and stir just until mixture forms a thick dough. Use your (clean) hands to knead the dough once or twice, pressing it together. (For more tender scones, don't over-knead.)
4. On a lightly floured surface, form dough into a circle, about 3/4 inch thick. Use a knife or pizza cutter to cut circle into 8 wedges/triangles. Place wedges on an ungreased baking sheet, not touching.
5. Bake at 425 degrees for 15 minutes, until scones are lightly browned on the bottom.
6. Make icing by whisking together the icing ingredients, adding just enough milk to make a drizzling consistency. Icing can be drizzled over warm or hot scones, or brushed on.

Yummy Fall Treat {Pear Chip Cake}

Sunday, October 5, 2014


Fall is my favorite season. My husband is bewildered by this, because we live in Alaska and autumn means that the snow will arrive at any moment. Here to stay for about six months. I can't help myself though. Fall is still my favorite. I love the rustle of leaves, anything pumpkin, and the warm cinnamony smells that come from a kitchen.  A once a year tradition here is to bake an apple chip cake, a recipe I received from an online friend years ago. This year I bought a bunch of pears that were getting riper faster than I expected so I decided to substitute the apples and make a pear chip cake instead. I did change the original recipe a bit simply because pears seem juicer than apples. So I reduced the amount of oil and pears slightly.

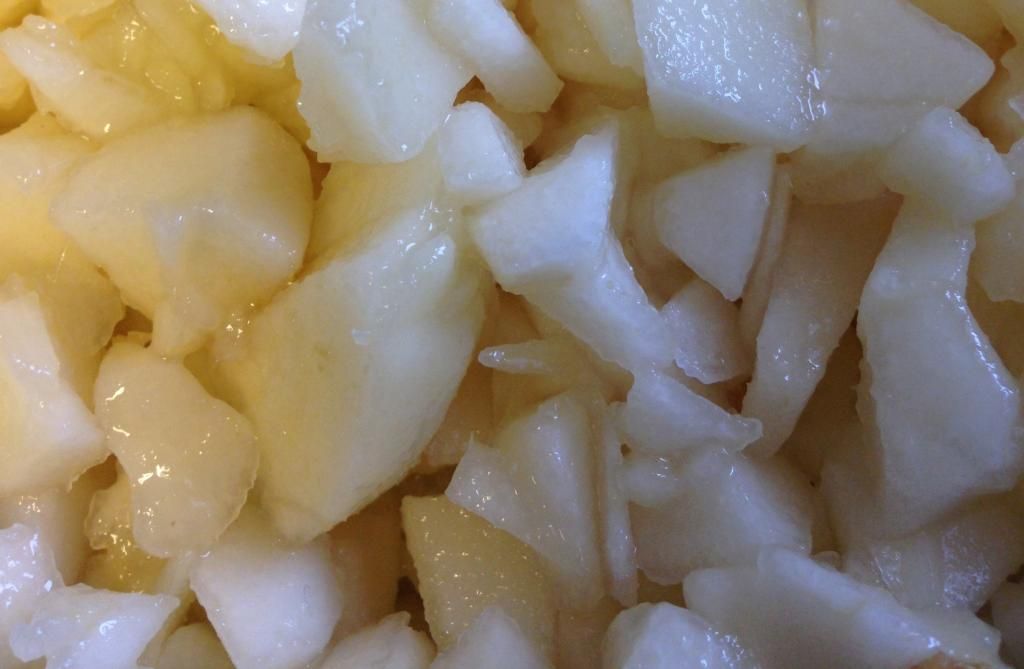
My only issue? Ripe pears are quite the trick to work with...slippery and slimy. But the end result was worth it!!!


Pear Chip Cake

1 cup oil
2 cups sugar
2 eggs
1 t. cinnamon
1 t. baking soda
1/4 t. salt
3 cups flour
1 t. vanilla
1 cup chopped nuts (optional)
2 1/2 cups peeled chopped pears (these are the "chips" that the recipe gets its name from)

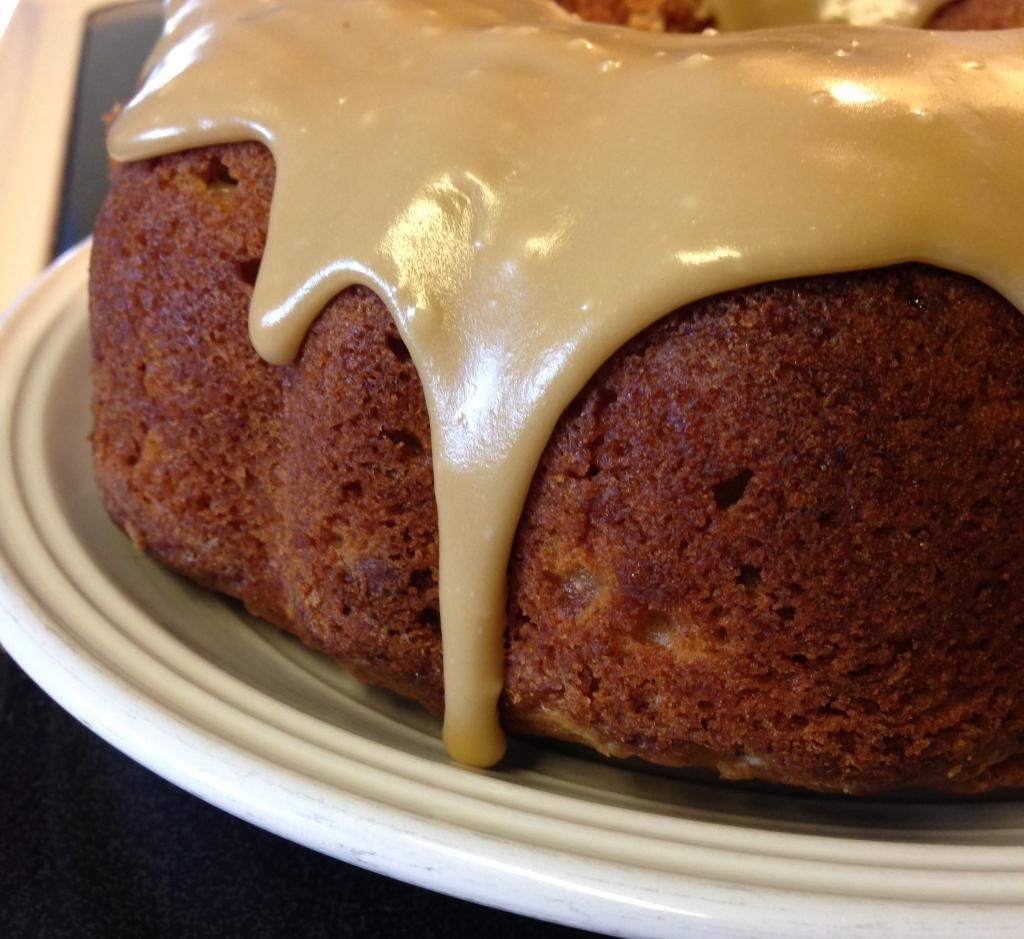
Preheat the oven to 350 degrees. Combine oil, eggs and sugar and beat until smooth. Sift together the cinnamon, baking soda, salt, and flour and mix into the wet ingredients.  The batter will be VERY stiff. Add the vanilla, pears and nuts and mix well. You can put the batter in a bundt pan like I did or in a 9 by 13. Bake for one hour. Cool and enjoy!


And if you really want to go all out...how about some caramel frosting?

Caramel Frosting

1/2 cup butter
1 cup brown sugar
1/4 cup milk
1 1/2 cups powdered sugar

Bring the butter, sugar, and milk to a boil. Boil for three minutes. Stir in the powdered sugar and pour over the the top of the cake.


The Fast Way to Homemade Pizza

Wednesday, September 17, 2014


Life has gotten crazy. My work schedule this year is more strenuous that it has ever been. For years I have done freezer cooking, but one of the meals that hasn't worked well for me is freezer pizzas. I have made complete pizzas and frozen them to bake later, but the prep time on them is overwhelming to me. I have put unbaked pizza dough in the freezer so that I could do homemade crust at a later date, but I never perfected how to thaw it and use it. A month ago I read online (wish I could remember where) that I could mix up pizza dough and freeze it immediately without letting it rise. Early the morning of serving I pulled it out and set it on the counter to rise ALL DAY. With all the other ingredients ready, I needed only about an hour to make fresh pizza that night! And most of that time is time in the oven, not hands-on work! When pizza dough rises for a long time it improves the flavor so this method is perfect! Even my family noticed it was a great-tasting crust!

Here's how I did it...

Pizza Dough

{From Breaking Bread with Father Dominic, but any dough recipe will work. This recipe makes two crusts.}
1 package active dry yeast (or 1 T. yeast if you buy in bulk)
1 T. brown sugar
3/4 cup whole wheat flour
2 cups lukewarm water
1/4 cup olive oil
1 T. salt (I use less)
4 to 5 cups white flour

Put all the ingredients in your mixer with a dough hook. Mix well (about 5 minutes). Spray the inside of a gallon Ziploc bag and place the dough in the bag. Freeze immediately. 

On the day of serving...pull out the dough and let it rise on the counter for 8 to 12 hours. I leave mine in the bag, but after an hour or so I pull it out and put it in a large bowl because it needs more space than what the bag provides. When you are ready to make the pizza, shape the dough and place it in a 450 degree oven to pre-bake for about 7 minutes. Pull the crusts out and top them with sauce, cheese, and your favorite toppings. Return them to the oven and bake for another 10-15 minutes until the cheese starts to bubble and brown.

To-Die-For Pizza Sauce

{A friend of ours shared this recipe, and I am so glad he did! Best sauce recipe ever! I make it ahead of time and freeze it.  I pull it out with the dough to thaw at the same time.  This is enough sauce for two pizzas.}

2 T olive oil
1 T butter
1/2 cup chopped onion
1/4 cup celery
1 garlic clove, minced
1 (8oz) can tomato sauce
1 (6 oz) can tomato paste
2 T grated parmesan cheese
1 t. dried basil
1 t. dried oregano
1/2 t. salt
1/2 t. sugar
1/4 t black pepper
1 small bay leaf
1 t. fennel seed

In a large skillet, melt butter with oil and then saute the onion, celery, and garlic. Add the remaining ingredients and simmer for 30-60 minutes. {NOTE: I didn't have fennel seed and the sauce was fine without it.} Remove the bay leaf.  At this point you can use the sauce or freeze it.  I tend to double or triple the recipe and freeze it for later.

So why not enjoy a pizza night?  So quick and easy!


All Things Fall {Favorite recipes and ideas for the season}

Sunday, September 7, 2014


Autumn is a second spring where every leaf is a flower. -Albert Camus

{Affiliate links used. Thanks for supporting this blog!}

My favorite season is upon us. Many people that I come across that know I live in Alaska think I am somewhat crazy for loving fall. Because isn't autumn just the predecessor to eight cold, icy months? My heart can't help it.  There is something about this season that I am in love with.  Here is a collection of recipes, ideas, and products that I love during this season...


Pumpkin Recipes- some of my favorites


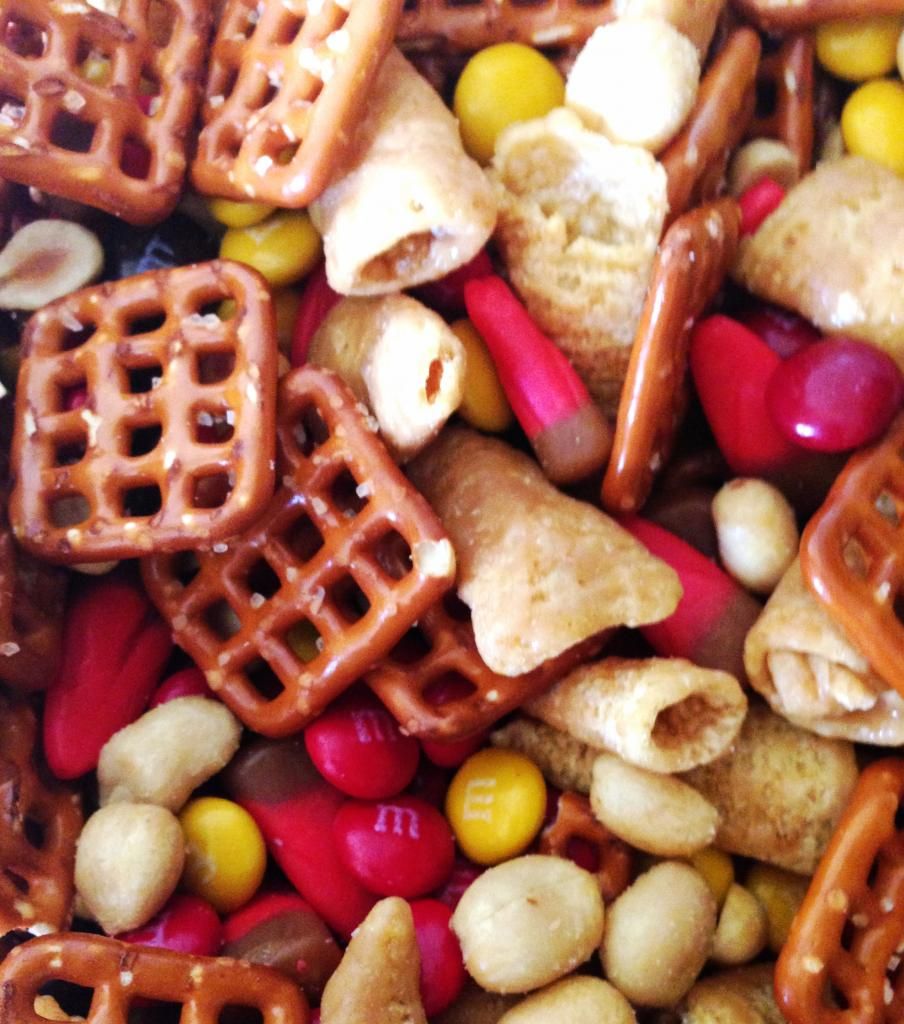
Fall Snack Mix - So quick and easy! Here is what I put in it... pretzels, peanuts, 
M&M's Fall Colors Milk Chocolate CandyCaramel Bugles, and Caramel Apple Candy Corn. No measuring...just dump and mix!


Apple Chip Cake

1 1/4 cup oil
2 cups sugar
2 eggs
1 tsp. cinnamon
1 tsp. baking soda
3 cups flour
1 tsp. vanilla
1 cup chopped nuts
3 cups peeled and chopped apples (hence the name, "apple chip")

Preheat the oven to 350. In a bowl mix oil, sugar and eggs. Beat until smooth. Sift flour, salt, baking soda and cinnamon and beat into wet ingredients to form a still batter. Add vanilla, nuts and apples. Stir to blend. Spoon batter into a 9 x 13 pan. Bake 1 hour.  (I tend to use a bundt pan instead.)

You don't really need to frost this cake. However, if you just can't resist this is the frosting that is the best!

Caramel Frosting

1/2 cup butter
1 cup brown sugar
1/4 cup milk
1 and 1/2 cups powdered sugar
Bring the butter, brown sugar, and milk to a boil. Boil three minutes and then stir in the powdered sugar. Pour over cake.


Candle wax melts from Grace Note Gifts {Love the scents that she comes up with!}


Fall Yankee Candles

My Fall Pinterest board with more ideas!


Care to share? What are you favorites of fall?