Showing posts with label Tutorials. Show all posts

Easy-to-Make Photo Holder

Tuesday, May 7, 2013

 This is a re-post from a few years ago.  I need to make a few more of these as I have given most of them away.  Such a fun and simple project...

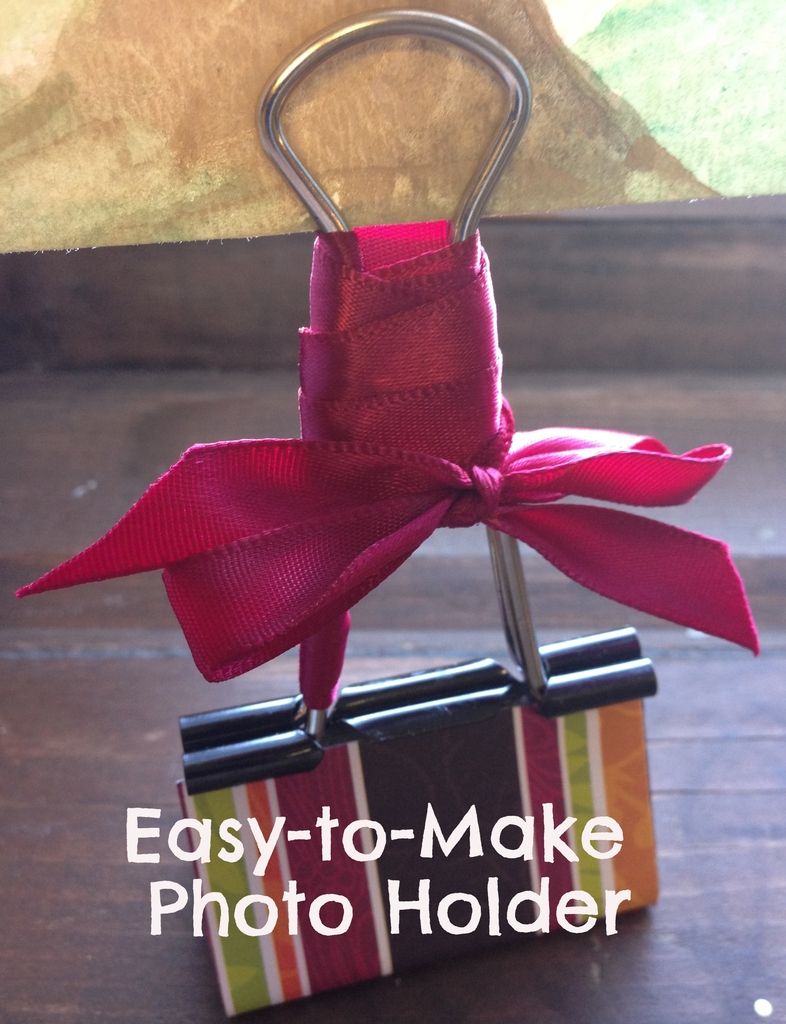
Want a frugal and simple gift to make?  How about a photo/recipe card holder? These are super easy to make and cost under two dollars.

You will need matching ribbons and scrapbook paper that coordinates with the ribbon.  A matching brad is nice, but not necessary.  You will also need UHU glue. I found mine at Michaels. And finally, the most important part...you will need a large or jumbo binder clip.  I bought a box of 12 for $6 at Office Max.


Cut a piece of scrapbook paper so that it can go around the outside of the binder clip (the black part).  I just measured the paper around it and marked off where I should cut.  I used a paper cutter to get a straight edge.

Next use the UHU glue to glue the paper to the clip.
Using a long piece of ribbon, wrap the ribbon up one side of the clip.  I start at the top and leave a little of one end loose (enough to tie a bow with) and then use the longer end to wrap the one side of the clip. This means you have to wrap the ribbon down the clip and then come back up with it so that it meets the other loose end.  Then you tie the loose ends into a bow.  Trim the ends so they aren't too long.
See?
I then take shorter pieces of ribbon of various coordinating colors and knot them on the other side. At the top of that pile of ribbon, you can take a brad and slip its back end in between the prongs of the clip. Then bend the brads ends so that it is secure.  It is probably hard to see in this picture.  You could also get jewelry wire and beads to decorate your clip. Just twist the wire about the prong and do "curls" with the wire (by curling it round a pencil).  Attach small beads to each end of the wire.

 You can then use your decorated binder clip to hold a recipe card or a picture!

Happy Crafting!
Word Art- A Tutorial

Wednesday, December 21, 2011

Yesterday I mentioned that I have chosen my Word of the Year for 2012...ABIDE.  I decided I would put some word art up in my house to remind me of my word throughout the year.

It is surprisingly easy to do these big letters!  I think it took me under an hour to finish them.

You will need:

Scrapbooking paper (coordinating paper is a great idea!)

Wooden letters (mine were already painted white...however, you could paint yours any color to match your paper)

Also needed: a sponge brush, Mod Podge, and a tool to distress the edges (like an Emery board or sandpaper).

First, pick out your paper.  Turn the letters on the reverse side and trace them on the backside of the paper.

Here's the letter "A" with its paper already cut out.

The other letters...ready to go...

Then paint Mod Podge on the front of the letter.  Place the paper on top.  It is ok if some of the edges hang over a bit as you are going to distress the edges. Let dry a bit.

Then pain Mod Podge over the top of the paper to seal them.  The paper will bubble a bit, but will smooth out as it dries.

Finally, using an Emery board, sand paper, or a distressing tool rub the edges of the paper to give them a rough-edged look.


And you are done! The end result!

Altered Journals- A Tutorial

Tuesday, September 20, 2011

I recently started creating some altered journals for birthday and Christmas gifts.  Here is a quick tutorial on how to make a beautiful journal for someone.

Take a regular composition book (got mine super cheap at Walmart). Place wax paper between the cover and the first page.  Do this for the back cover also. This protects the pages from getting glue or modge podge on them.

I used UHU glue to adhere a piece of scrapbooking paper to the front. I used a 12 by 12 piece of paper.  You can do this one of two ways: either adhere the paper (as seen below) and then cut of the overlap at the top or measure the height of the journal and then cut your strip off before adhering the paper.  I found the second way to be easier.  You will have extra paper on the side. That paper is going to be folded on to the inside cover.


{Notice the strip cut off from the top}

{Here is a picture of the inside once you have folded over the extra paper.}

You will notice that you still have some of the inside cover showing.  I just take a strip of coordinating paper and glue it in.

I repeat this process with the back cover.


I then Mod Podge the outside and inside of both covers.

Here is an example of a finished journal.

Notice the inside of the covers where I glued an extra strip of paper to completely hide the cover.  On the back cover on the inside I attached a long ribbon with glue dots.  This ribbon can be used as a marker in the journal.


So what have you made lately?  I would love to hear your ideas!

Bookmark Cards

Friday, January 21, 2011


I made some of these (see above video) for those I am mentoring through the Bible in 90 Days.  Here are my results:


Gift Card Holders

Saturday, December 18, 2010


I recently made some gift card holders for Christmas.  I just love being creative and making my own card holders.  I have to admit though that the creativity isn't my own.  I totally love to copy others!  Here are some cool tutorials for gift card holders.

Favorite Card Designs

Tuesday, December 14, 2010

{Tri-Shutter Card}

Lately, I have been exploring making some creative cards.  Splitcoast Stampers is a great place to find tutorials for different fun types of cards. Many of these tutorials have a video at the end that takes you through the creation of the card step by step.  Here are my favorites:


Tri-Shutter Cards

Tuesday, December 7, 2010


I recently made this tri-shutter card.  It looks so complicated, but it isn't!  I was amazing.  The instructions are on Splitcoast Stampers, a site that I love for new ideas in papercrafting.  If you scroll down to the bottom you can see a video on how to make the card.

3-D Snowflakes Again!

Tuesday, November 30, 2010

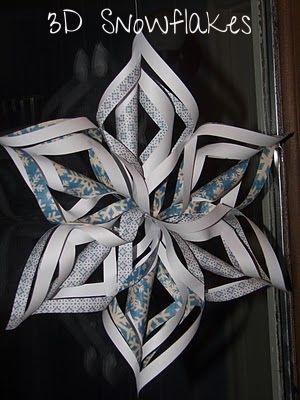
I just love these snowflakes!  They are so pretty and easy to make!


 Recently, I made three of them to hang in our big picture window.


 For complete instructions on how to make them, see this and this.


Happy Crafting!


Puppy Pillows

Wednesday, October 20, 2010

A couple of weekends ago a friend of mine had to go out of town for a conference.  She left her daughter and dog with us.  Their dog is actually Titan's mom, Olive. Well, when they brought in Olive's kennel I noticed a cute pillow in it.  I told my friends' daughter, "We should make one for Titan."  The next morning we got up and went to JoAnn's to buy fabric and stuffing for the pillow. We bought polar fleece to make the pillow comfy and warm. One yard of the bone pattern you see in the pictures and one yard of a light blue fleece that matched is all we needed.  Basically, the pillow is made like those tie blankets that are so easy to make.  We laid the two pieces of fabric on top of each other and cut a fringe all the way around.  Then we tied the fringes together on three sides.  Finally, we stuffed the pillow and finished tying the last edge.
 We even had enough material for a small blanket.  Titan is such a "blankie boy"...carries it around with him sometimes!

If you are interested in a tutorial on no-sew fleece blankets, check this out.

A Simple Gift to Make

Tuesday, September 28, 2010

{Affiliate links used. Thanks for supporting this blog.}

Want a frugal and simple gift to make?  How about a photo/recipe card holder? These are super easy to make and cost under two dollars.

All you need are these larger binder clipsribbonpatterned paper, and UHU glue.


Cut a piece of scrapbook paper so that it can go around the outside of the binder clip (the black part).  I just measured the paper around it and marked off where I should cut.  I used a paper cutter to get a straight edge.


Next use the UHU glue to glue the paper to the clip.


Using a long piece of ribbon, wrap the ribbon up one side of the clip.  I start at the top and leave a little of one end loose (enough to tie a bow with) and then use the longer end to wrap the one side of the clip. This means you have to wrap the ribbon down the clip and then come back up with it so that it meets the other loose end.  Then you tie the loose ends into a bow.  Trim the ends so they aren't too long.


See?


I then take shorter pieces of ribbon of various coordinating colors and knot them on the other side. At the top of that pile of ribbon, you can take a brad and slip its back end in between the prongs of the clip. Then bend the brads ends so that it is secure.  It is probably hard to see in this picture.  You could also get jewelry wire and beads to decorate your clip. Just twist the wire about the prong and do "curls" with the wire (by curling it round a pencil).  Attach small beads to each end of the wire.

 You can then use your decorated binder clip to hold a recipe card or a picture!


Happy Crafting!